 Monkey Bones Super Slouch in February,
 and Ripley in March.
 After that, things got kind of off track during the summer. I'd been waiting forever for Carrie to write up the pattern for the Uncle Frank hat and as soon as Dear Baby Francis came out, I was all over it. That's for a total of 4 so far.
 For Christmas, Hubbs asked for a Freestyle Snowboarder's hat to match her skiing coat, in brown and black. I haven't blogged this one, as it was finished over this busy Christmas period, but it's made with Debbie Bliss's Alpaca Silk Aran.
 Hubb's hubby needed a hat too. So I whipped him up a Fine Fella - same as the one I made my own hubby earlier this fall, for a total of 7. Phew, over halfway to 12.
I had forgotten about these two beauties until I was trawling through pictures for this post. They are two tiny baby hats I made for Teddy's teacher from 1st grade. She had her 2nd baby - a girl - and I whipped these up to keep her little head warm. Aaawww. I forget the yarns, but I think you can see the softness, right ;0)

My final unblogged and unphotographed completed hat, is Tiny Owl Knits' Orchids and Fairylights. I made it for my SIL's 40th birthday which was on 23rd December. Well, that'll explain that rush then! I'll get a photo of it one day....
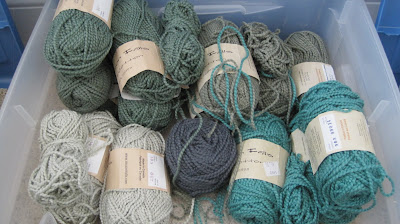
There was one other hat, but that's in solitary confinement until I can work out/stop procrastinating on, what to do with it. It was Plicate by Hunter Hammersen. I used Toasted yarn from A Verb for Keeping Warm. Let's just say the yarn didn't work with this pattern and leave it at that.
So, that brings the total 2011 hats to 11. Not far off my goal, and mainly crammed into the last month of the year, but still, I had a lot of fun with them.
Tomorrow is another knitting year and I wonder what it will bring.......
 But, I especially like the squiggly back and forth cables. They are fun to knit and look great.


 Other side......
 Buttony closure. No need for button holes. The granny square has them built-in.
 Buttons courtesy of Michele's vast volumes of vintage. Couldn't resist that bit of alliteration. Carry on! And some duplicate stitch stems in that contrasting green, to tie it all together.
 Our first lunch in NYC is always at a
  I took Teddy to the
  No, this next photo is not "Occupy Wall Street". They were long gone, when we walked past Zuccoti Park. This is one of the campers, waiting to see Justin Beiber at the Today Show. I am partial to the little songster, but seriously?! It was cold. And wet. And did you see how he wore his jeans below his bottom, with his underpants all on display? I have no idea what's up with that, except I may be getting old. Whatevs!
 And rising, right next door to the memorial, is the new
  Returning to the happy, what's a Thanksgiving trip to NYC without a show at
  And this is what holds it up. Yes, that is just one cable. Yikes!
 And the brothers. They love each other so :0)
 The last night of our trip, Tommy and I went to a friend's birthday party, while the grandparents looked after the boys. We stayed in a super-swanky hotel and I had to take a picture of the view from one side of our corner room. The other side, looked over the Library and down 42nd st. It was AWESOME!
 Now, let's end this travelogue with some more knitting. Spotted in the library of the


 This morning, I noticed these beauties, popped out just in time to replace the fall tree leaves. Can't you almost taste Christmas? :0)


